In this activity you will implement the battery + led panel example that we used to understand Services in the previous section. When the battery is empty we power on a LED, and when the battery is full we power it off.
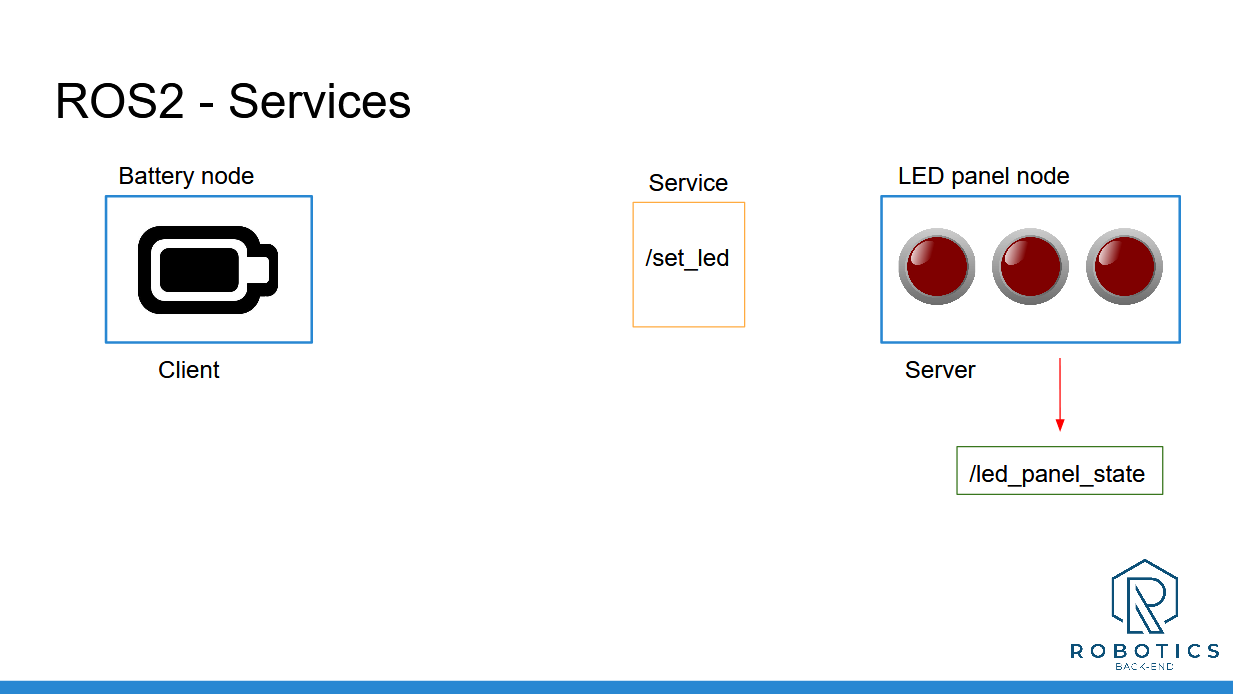
So, here’s the initial state:
Blue boxes are for nodes, orange for services, and green for topics.
You can simply represent the state of the battery by a “battery_state” variable inside the battery node, and the LED panel by an integer array, inside the LED panel node.
At first, the battery is full, and all the LEDs are powered off ([0, 0, 0]).
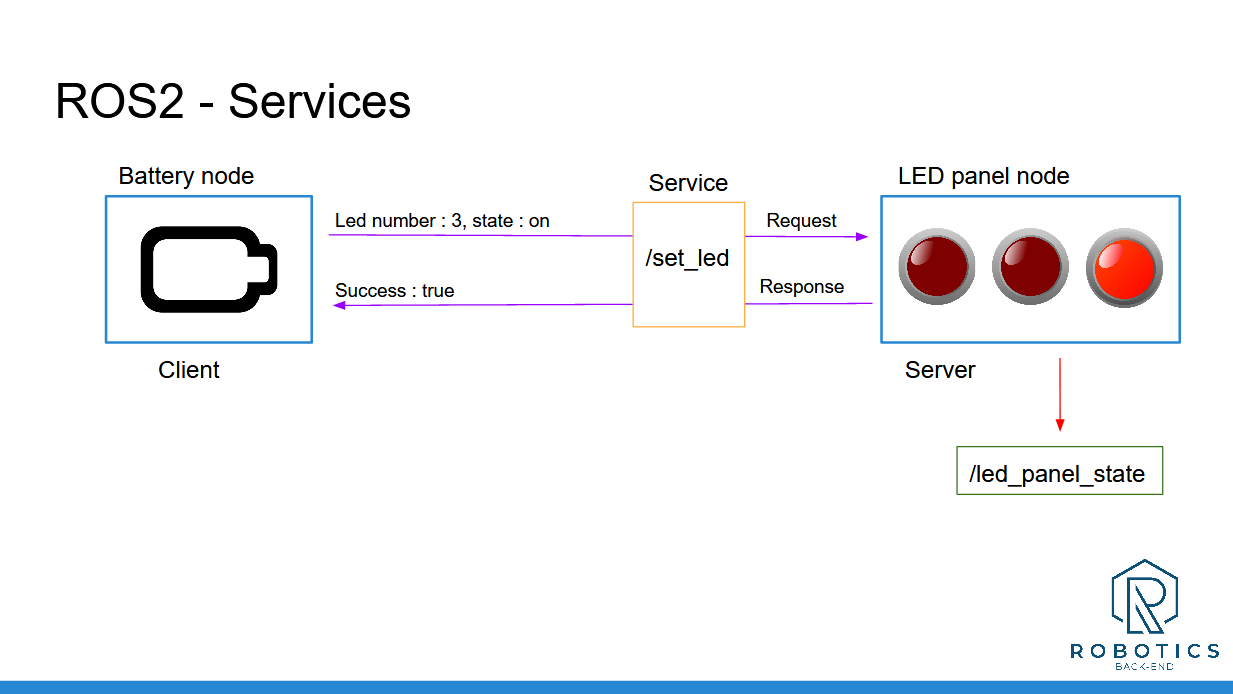
Now, you will fake the battery state evolution. Let’s say that the battery is empty after 4 seconds, and then after 6 more seconds it’s full again. And so on.
When the battery is empty, the battery node will send a request to the LED panel, to power on one LED.
And, 6 seconds later, when the battery is full again, it will send another request to power off the LED.
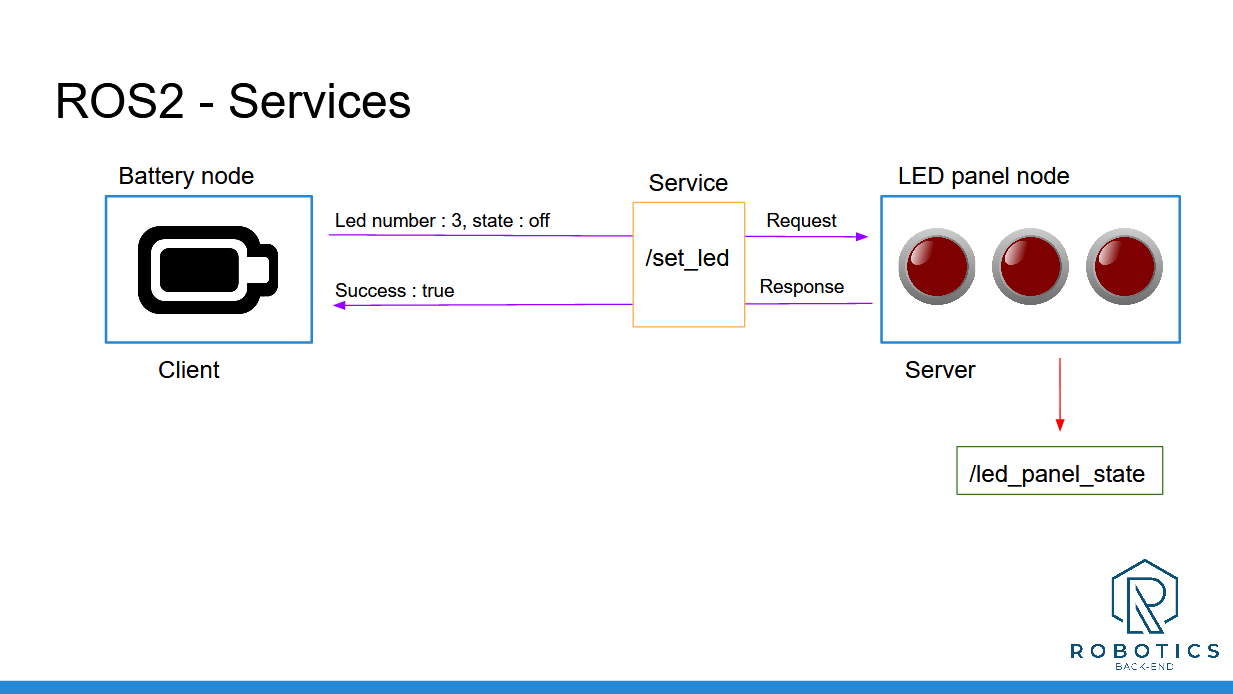
And you can continue looping between those 2 states indefinitely (until you press CTRL+C).
You will have to create:
1 node for the battery
1 node for the LED panel
A custom msg definition for the “led_panel_state” topic
A custom srv definition for the “set_led” service
This activity really sums up everything you’ve seen before. If you skipped some of the previous activities, don’t skip that one!
Of course there is not only one solution. You may succeed with a different code that the one I will provide.
And, as usual, I’ll see you in the next lecture for the solution. For more clarity and to help you navigate easily between the steps, I will separate the solution in 3 videos:
Step 1: create LED panel node and publish the LED panel state (with a custom message)
Step 2: add a service server inside the LED panel node (with a custom service definition)
Step 3: create the battery node, simulate the battery life, and call the “set_led” service with a service client