In this section you’ve seen how to create your own first ROS 2 nodes, in both Python and Cpp. This is already a good foundation. If you read this, then you’ve already made a lot of progress!
Quick recap: Nodes are subprograms in your application. Each node is responsible for only one thing. And nodes communicate between each other through topics, services, and parameters. If you look at the next few sections, well that’s exactly what we’ll work on.
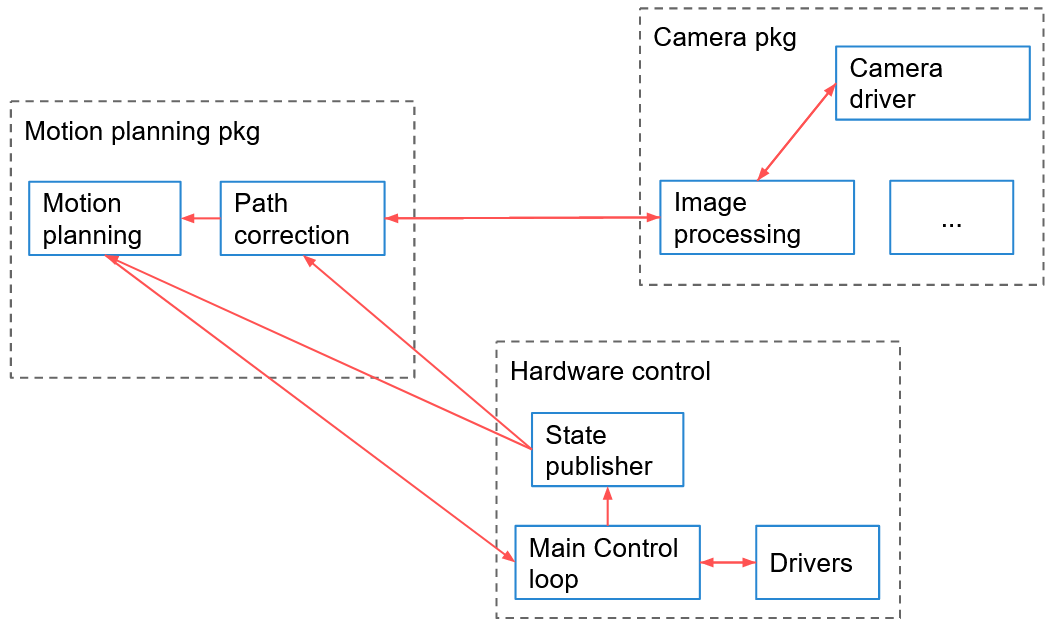
Here’s an example of an architecture for a ROS 2 application, where you can see packages and nodes:
Before creating your first node you need to:
Create a ROS 2 workspace and source it.
Create a (Python/Cpp) package.
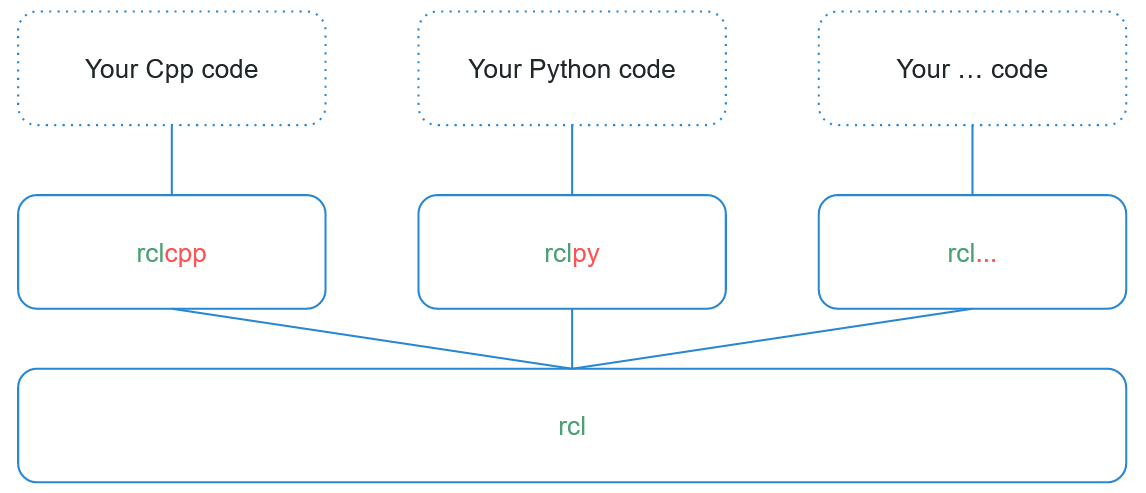
Then, you write your node using the appropriate ROS 2 client library: rclpy for Python, and rclcpp for Cpp. Both libraries will provide the same core functionalities.
After writing the node, you compile it, and you re-source your environment in order to use it. Nodes are compiled (only for Cpp), and installed (for both Python and Cpp), inside the install/ folder of your ROS 2 workspace. You can directly execute them from here, or by using the command line tool “ros2 run <package> <executable>”.
If you don’t understand everything right now, it’s totally OK (and it’s quite normal). ROS concepts are quite hard to grasp the first time. Continue to make progress in the course, and come back to this section later. It will all make sense in the end and you’ll have a solid global overview.
In the next section, you’ll practice a little bit more with nodes, and you’ll discover some useful ROS 2 tools. Being comfortable with the tools will help you when working on Topics, Services, etc.
____________________________________
You can download the complete code for this section (attached to the "Section Conclusion" lecture, named "code_end_section_3.zip"). I’ve included everything that is inside the ROS 2 workspace, under the ~/ros2_ws/src/ folder.