Before continuing, please make sure that you have followed the guidance to use a development and production docker-compose file earlier in the section:
Please use the following instructions to create an environment with the Amazon Linux 2023 Platform. Since the AWS UI and options change frequently, these are provided as a lecture note instead of a video lecture.
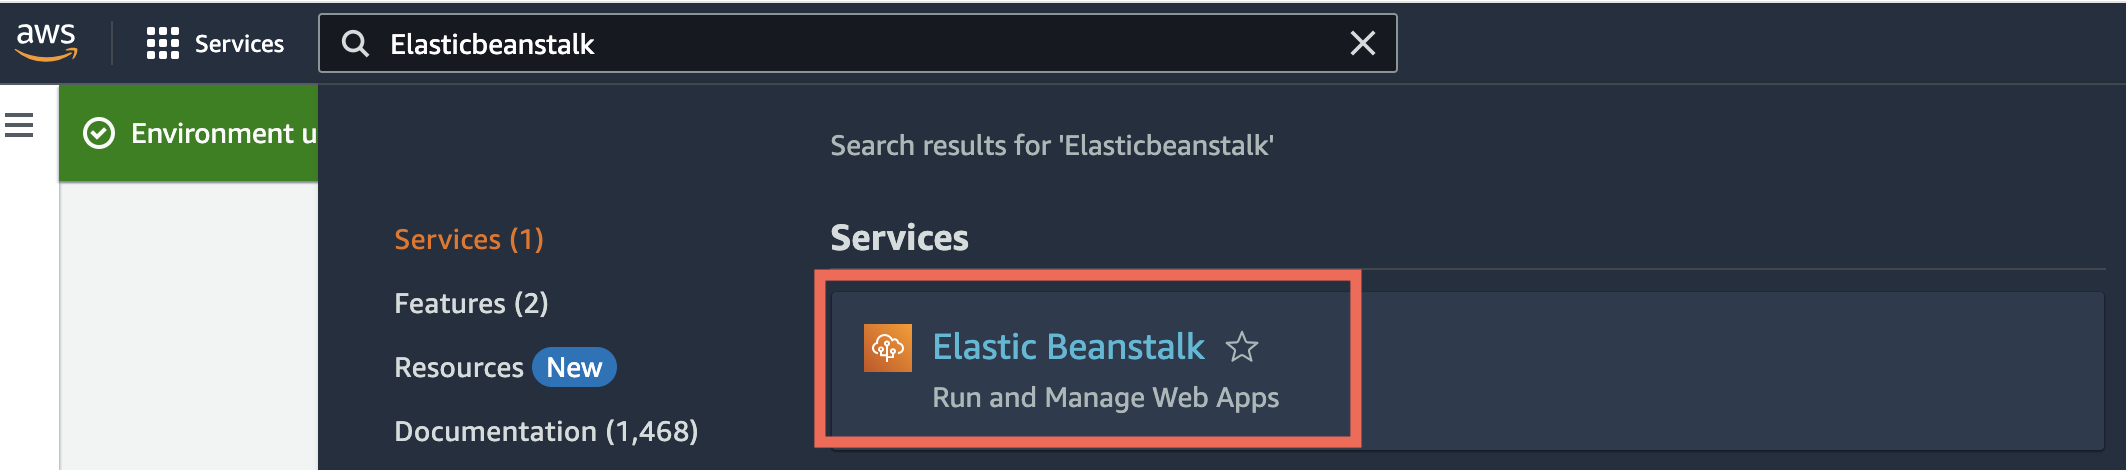
1. Go to AWS Management Console
2. Search for Elastic Beanstalk and click the Elastic Beanstalk service.
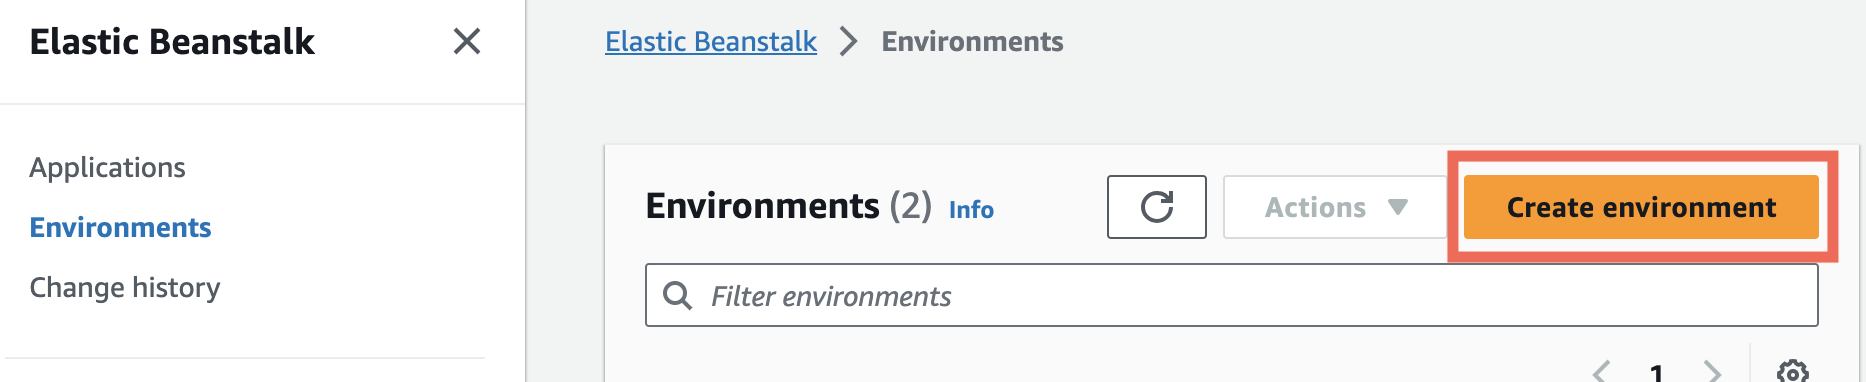
3. Click the Create environment button.
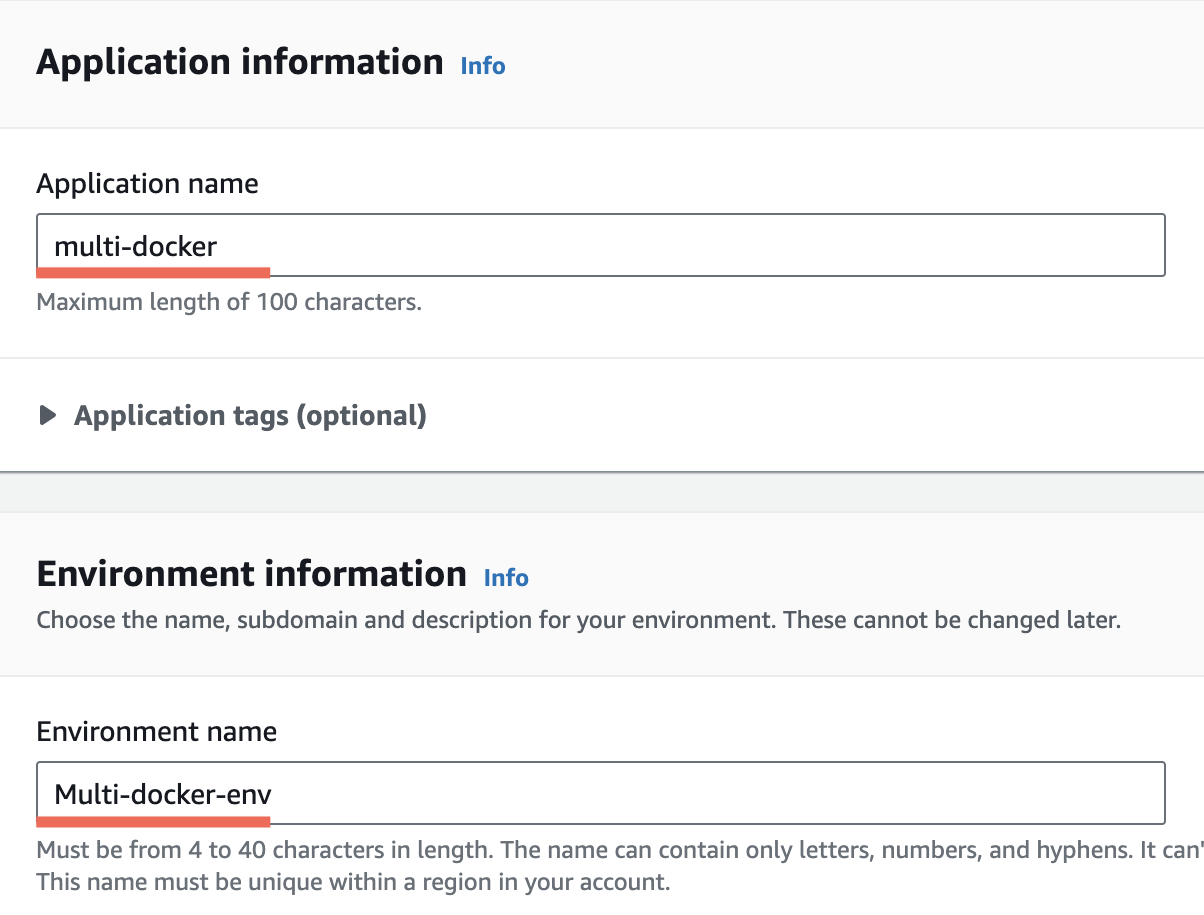
4. You will need to provide an Application name, which will auto-populate an Environment name.
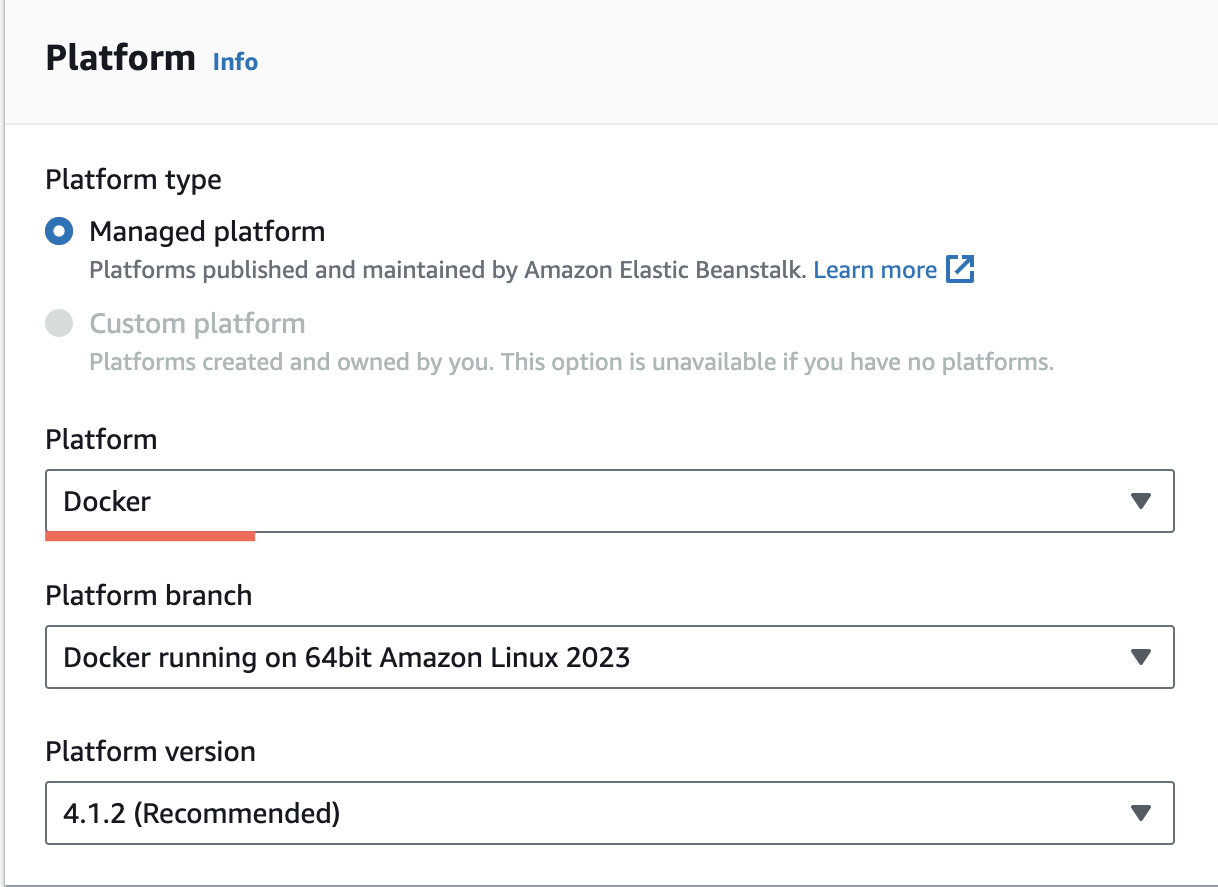
5. Scroll down to find the Platform section. You will need to select the Platform of Docker. This will auto-select several default options.
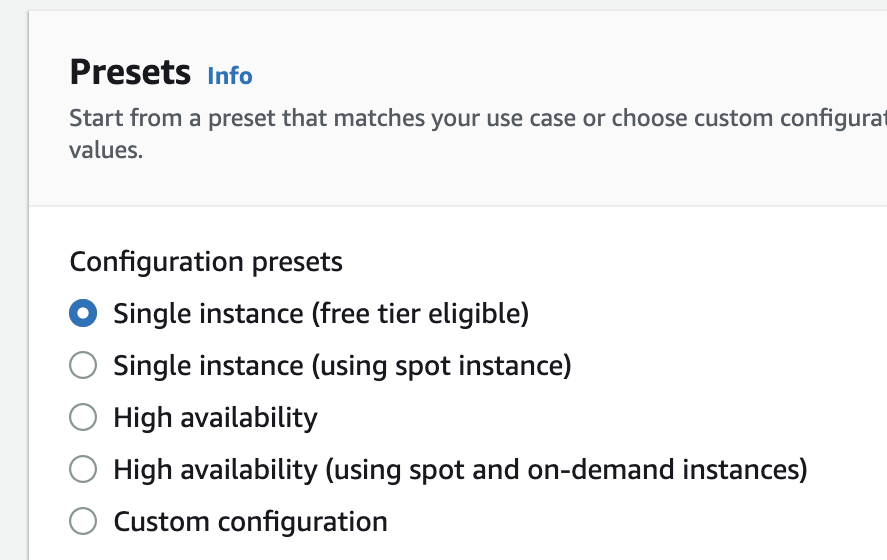
6. Scroll down to the Presets section and make sure that free tier eligible has been selected
7. Click the Next button to move to Step #2.
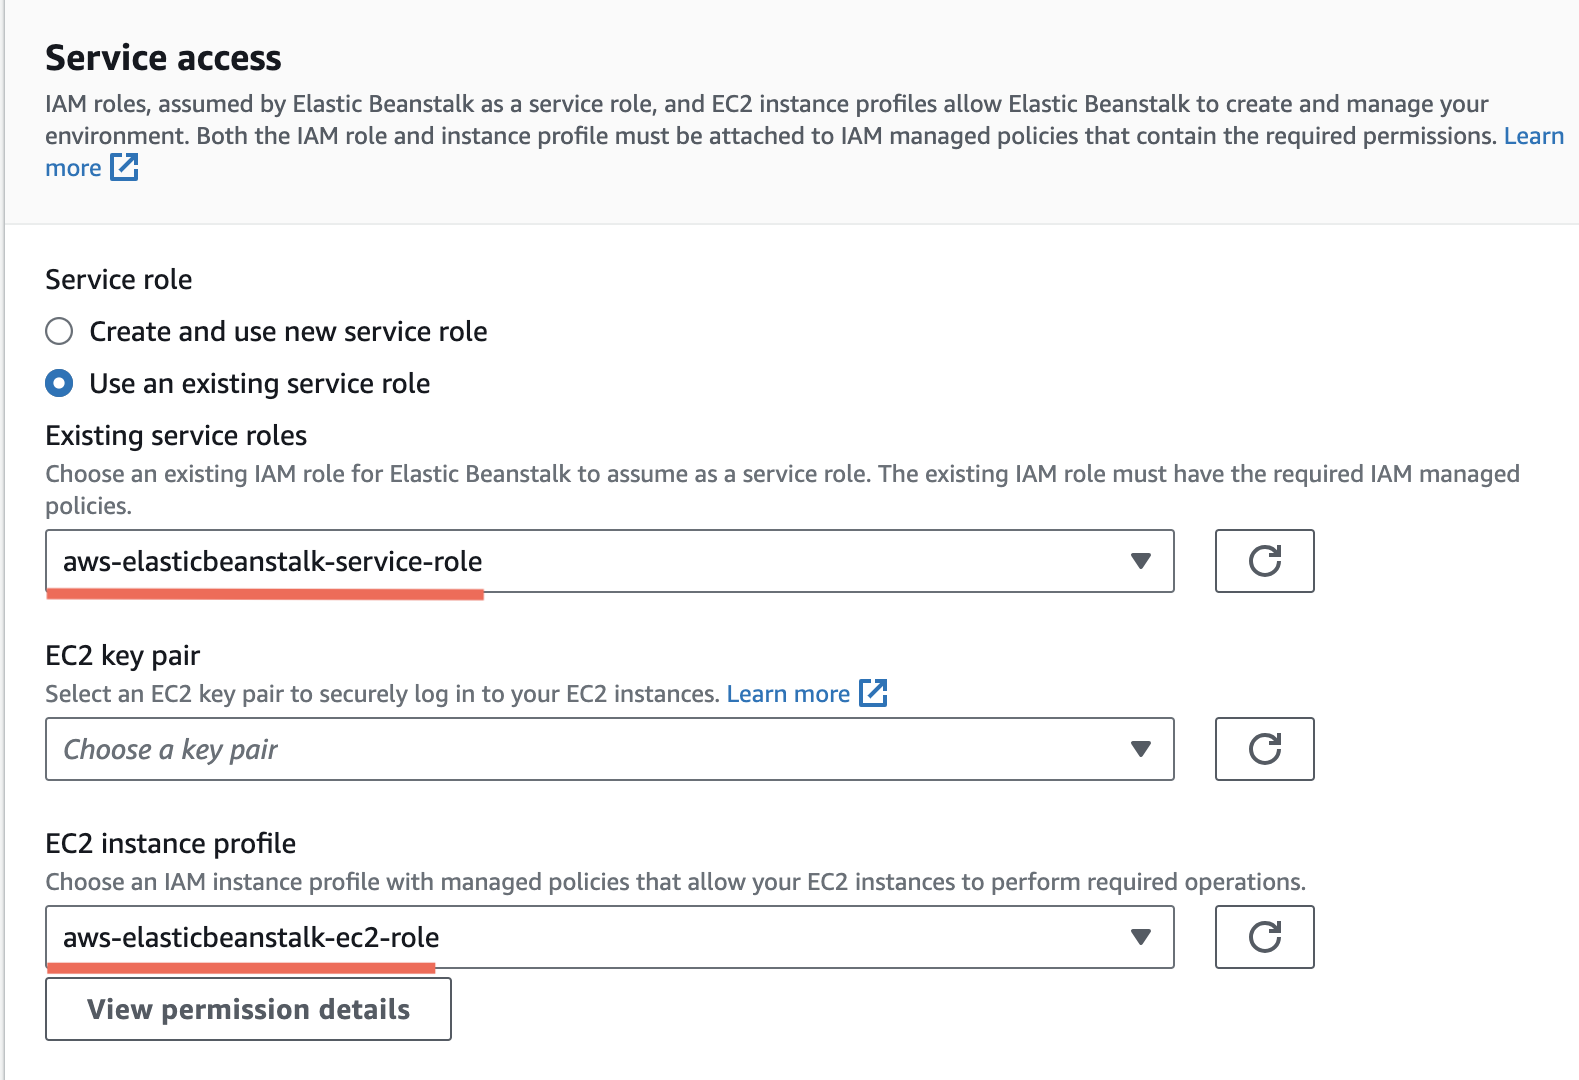
8. You will be taken to a Service Access configuration form.
Ensure that Use an existing service role is selected and that the service role created in Section 7 is listed. This should also auto-populate the EC2 instance profile with the ec2-role that was previously created.
9. Click the Skip to Review button.
10. Click the Submit button and wait for your new Elastic Beanstalk application and environment to be created and launch.
Important - Attached to this lecture is a cheatsheet complete with all the steps to configure the multi-container project in AWS.